
Building a course: modules and lessons
Create a course and arrange it in modules and lessons of eight types: video, audio, PDF, text, files, quiz, assignment and live session.
A course is a product of type Course: lessons arranged in modules, where each student follows their progress and, if you like, gets a certificate on completion. Students watch the course from My library on any device.
Who can create one?
The platform owner, admins and anyone with permission to manage products. Published courses: Free 1, Pro 10, Business Unlimited. Up to 500 lessons per course.
Steps
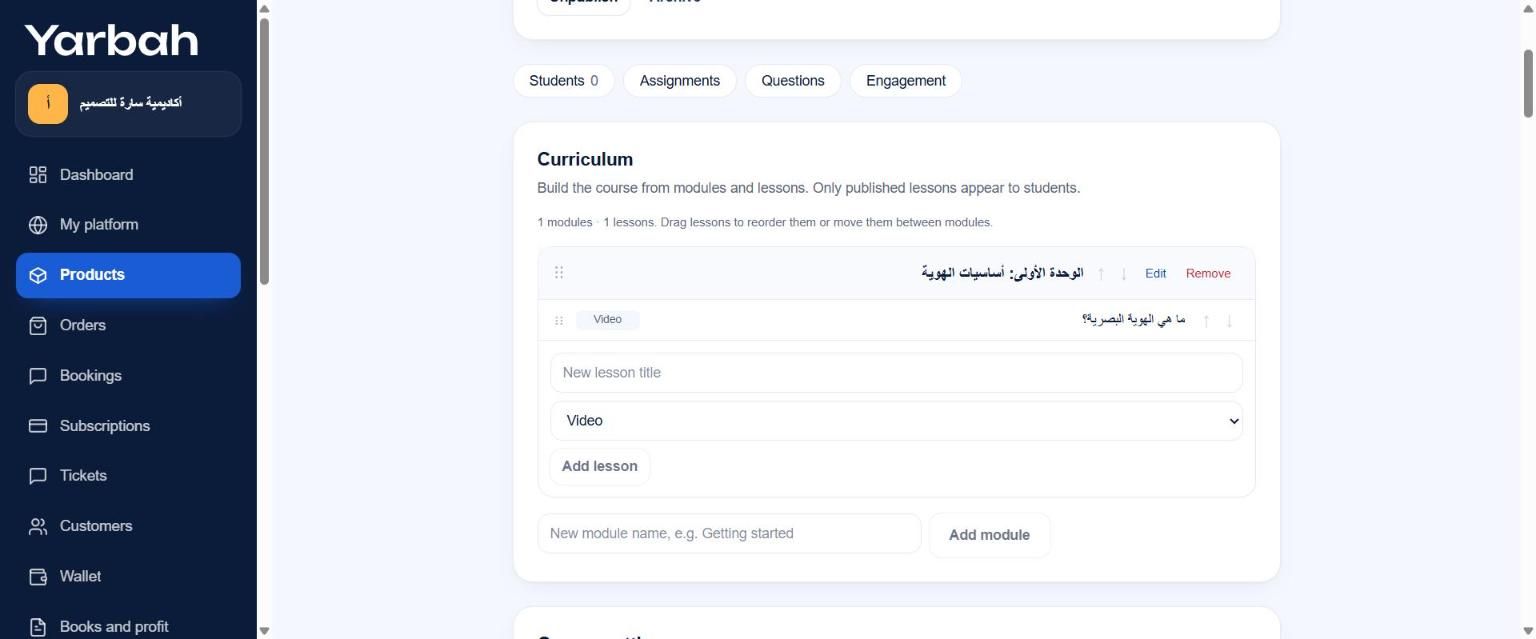
- From Products, create a new product and choose Course.
- Under Curriculum, write the first module's name (such as Getting started) and select Add module.
- Under the module, write a New lesson title, pick the Lesson type, and select Add lesson.
- Select the lesson to open Edit lesson, add its content, then select Save and publish.
- Repeat for the other lessons. Drag lessons to reorder them or move them between modules.
- Set the course settings, complete the description and image, then publish the course.
Lesson types
- Video: Upload a video (MP4 at 720p is best for students on mobile data), or a YouTube or Vimeo link (unlisted YouTube or private Vimeo videos work best).
- Audio: MP3 or M4A.
- PDF: students read it inside the lesson.
- Text: a written lesson. Use
#for headings,-for lists,**bold**and links. - Files: worksheets, slides or code students download.
- Quiz: multiple-choice or short-answer questions, with a pass mark and attempts. It can become a timed exam.
- Assignment: the student writes their answer and can add a link, and you review it. Reviewing assignments.
- Live session: the Date and time and the Meeting link; only enrolled students see the link. Streaming inside Yarbah.
A lesson file's size follows your plan (Pro 2 GB) and counts toward storage. The page shows the Storage used.
Each lesson's fields
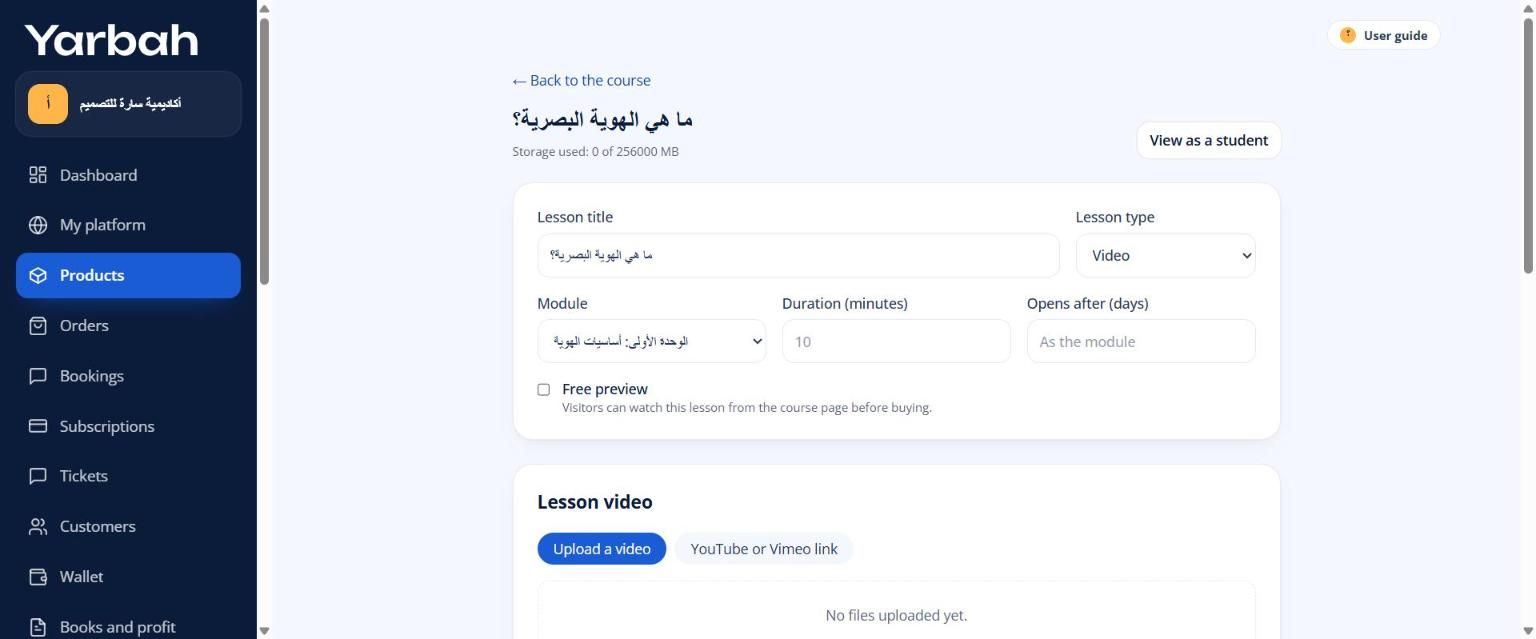
- Lesson title and Module.
- Duration (minutes): shown to students in the lesson list.
- Opens after (days): to release the lesson gradually. Leave it As the module to use the module's setting.
- Free preview: visitors can watch this lesson from the course page before buying. Make one or two lessons a preview so buyers know your style.
- Lesson notes: text shown under the content.
- Lesson files: up to 10 files students download from the lesson.
Select View as a student to see the lesson as students do.
Quizzes
- In a Quiz lesson, select Add question.
- Pick the Question type: Multiple choice or Short answer.
- For multiple choice: write the options and tick the Correct answer (tick more than one for multi-answer questions).
- For short answer: write the Accepted answers (one per line).
- Add the Explanation shown after answering (optional) and the Points.
- Set the Pass mark (%) and Attempts allowed, then select Save questions.
Editing or removing a module
Each module has Edit (its name and Opens after (days)), Remove, Move up and Move down. Removing a module or lesson keeps students' progress.
Messages you may see
- A published course needs at least one published lesson.
- You reached your plan's limit of published courses. Upgrade, or unpublish another course.
- Use a YouTube or Vimeo link that starts with https://
- This file type doesn't fit the lesson. Videos: MP4, WebM or MOV. Audio: MP3, M4A, AAC, WAV, OGG. Documents: PDF.
- Each question needs a prompt, at least two options and one correct answer.
Updated 19 November 2026